A Look at Rockwool Comfortboard and a Fantastic Alternative

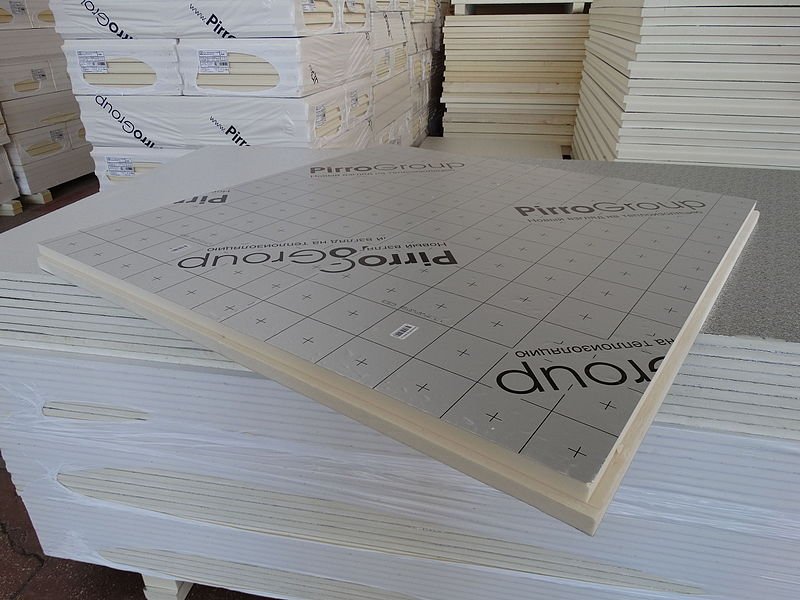
Rockwool Comfortboard 80 is a modular rigid stone wool insulation board made from rocks. If you’re going for a big-bad-wolf-proof building, Rockwool should be on your list to consider for insulating your exterior walls. Rockwool isn’t perfect for every application though, it can be expensive, heavy, and challenging to install.

Here, we cover the major benefits of Rockwool, its shortcomings, and what other options are available to insulate your walls in your home or commercial project.

Benefits of Rockwool Board

Rockwool has a number of things going for it. Here are some of the benefits of choosing Rockwool Comfortboard 80 to insulate your project:

  • Made from natural and recycled raw materials

  • Excellent fire resistance with no smoke production or flame spread

  • Termite and insect resistant

  • High compressive strength

  • Provides acoustic sound absorption

Where to Use Rockwool Comfortboard 80

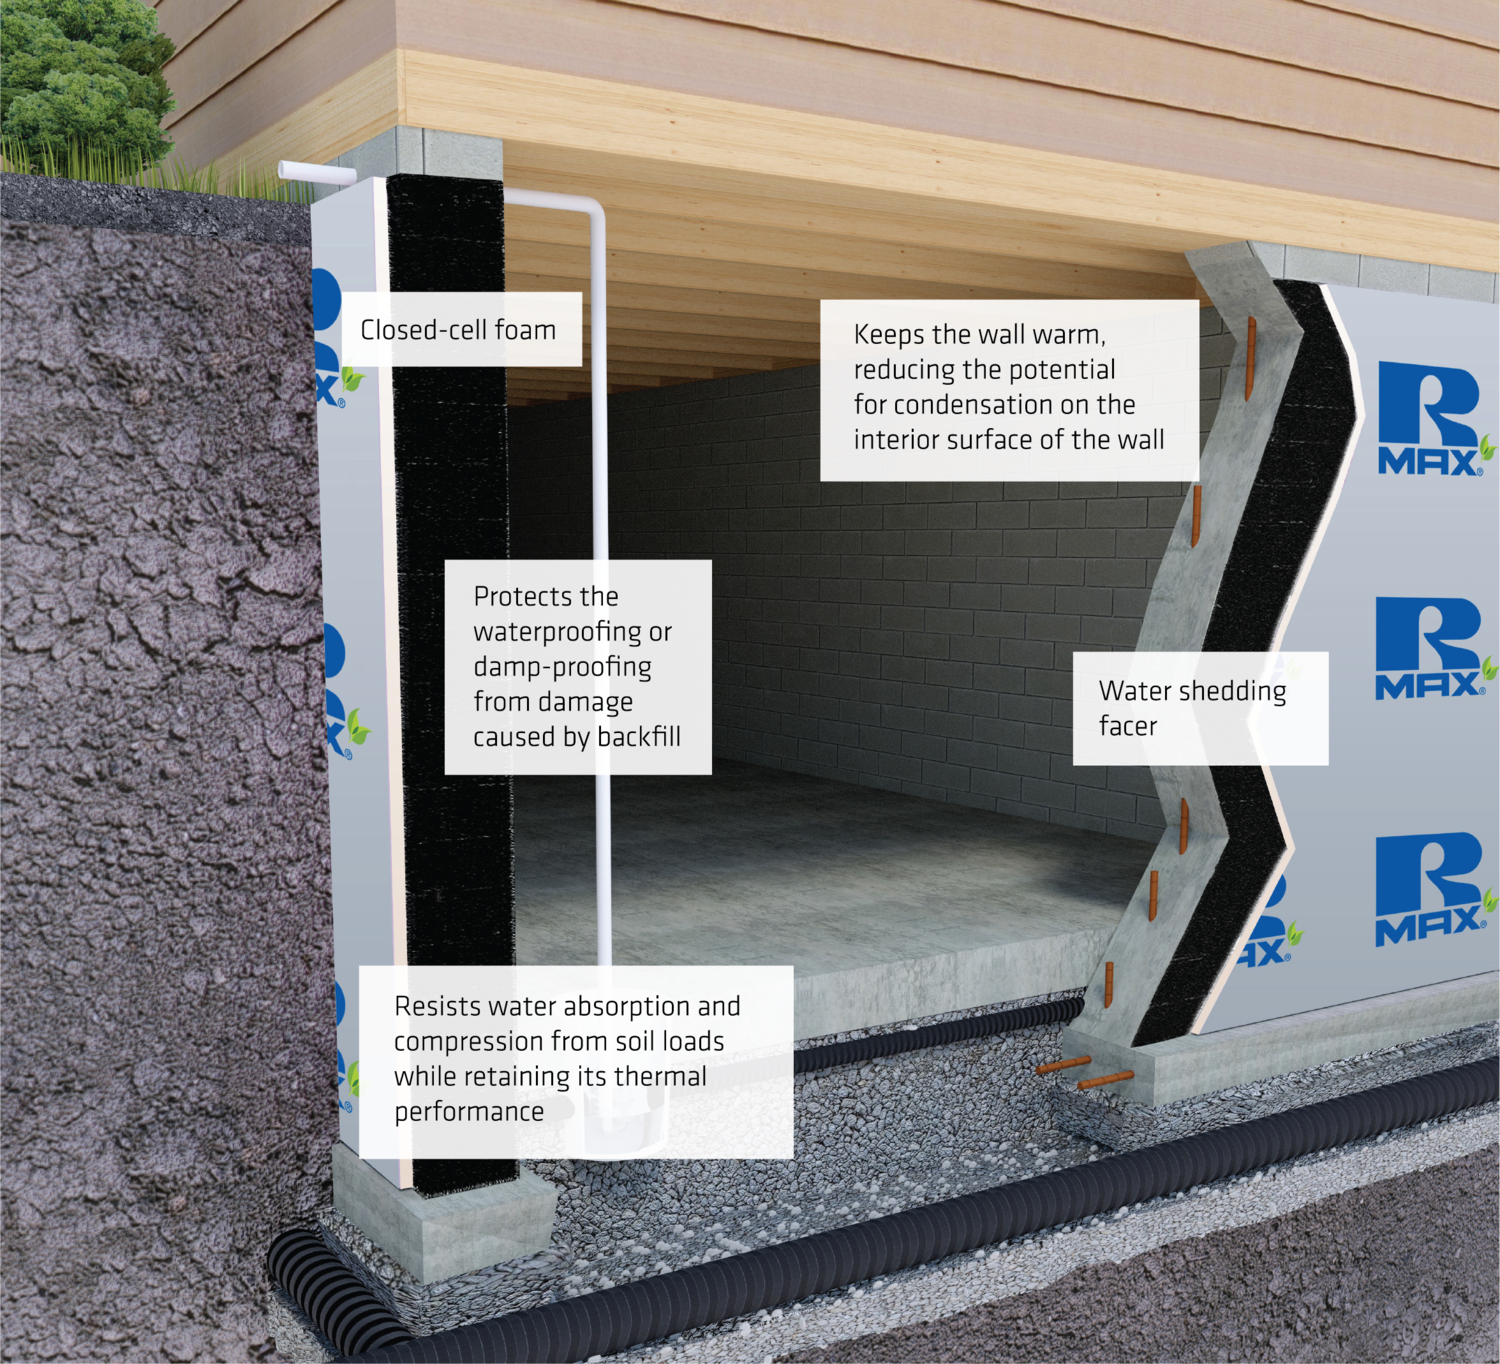
Rockwool Comfortboard 80 is designed for use on the exterior side of the wall for continuous insulation. It’s installed with 3-inch washers and nails, and is attached to sheathing over a vapor barrier or house wrap. Other applications can include foundation walls and under concrete slabs.

Disadvantages of Rockwool Insulation

Rockwool is a great option for some projects, however this type of insulation isn’t always the best for every application. Some of the shortcomings of Rockwool Comfortboard include:

Weight

It’s heavy, at over 50 lbs. per 4’ x 8’ board at 2” thickness, which makes installation laborious.

R-Value

At R4.2 per inch, Rockwool Comfortboard 80 is a middle-of-the-road option when it comes to thermal R-value performance.

Cost and Availability

Rockwool Comfortboard 80 can be difficult for homeowners to obtain because it is not typically stocked in big box stores, so it can be a challenge to obtain, and pricier to purchase.

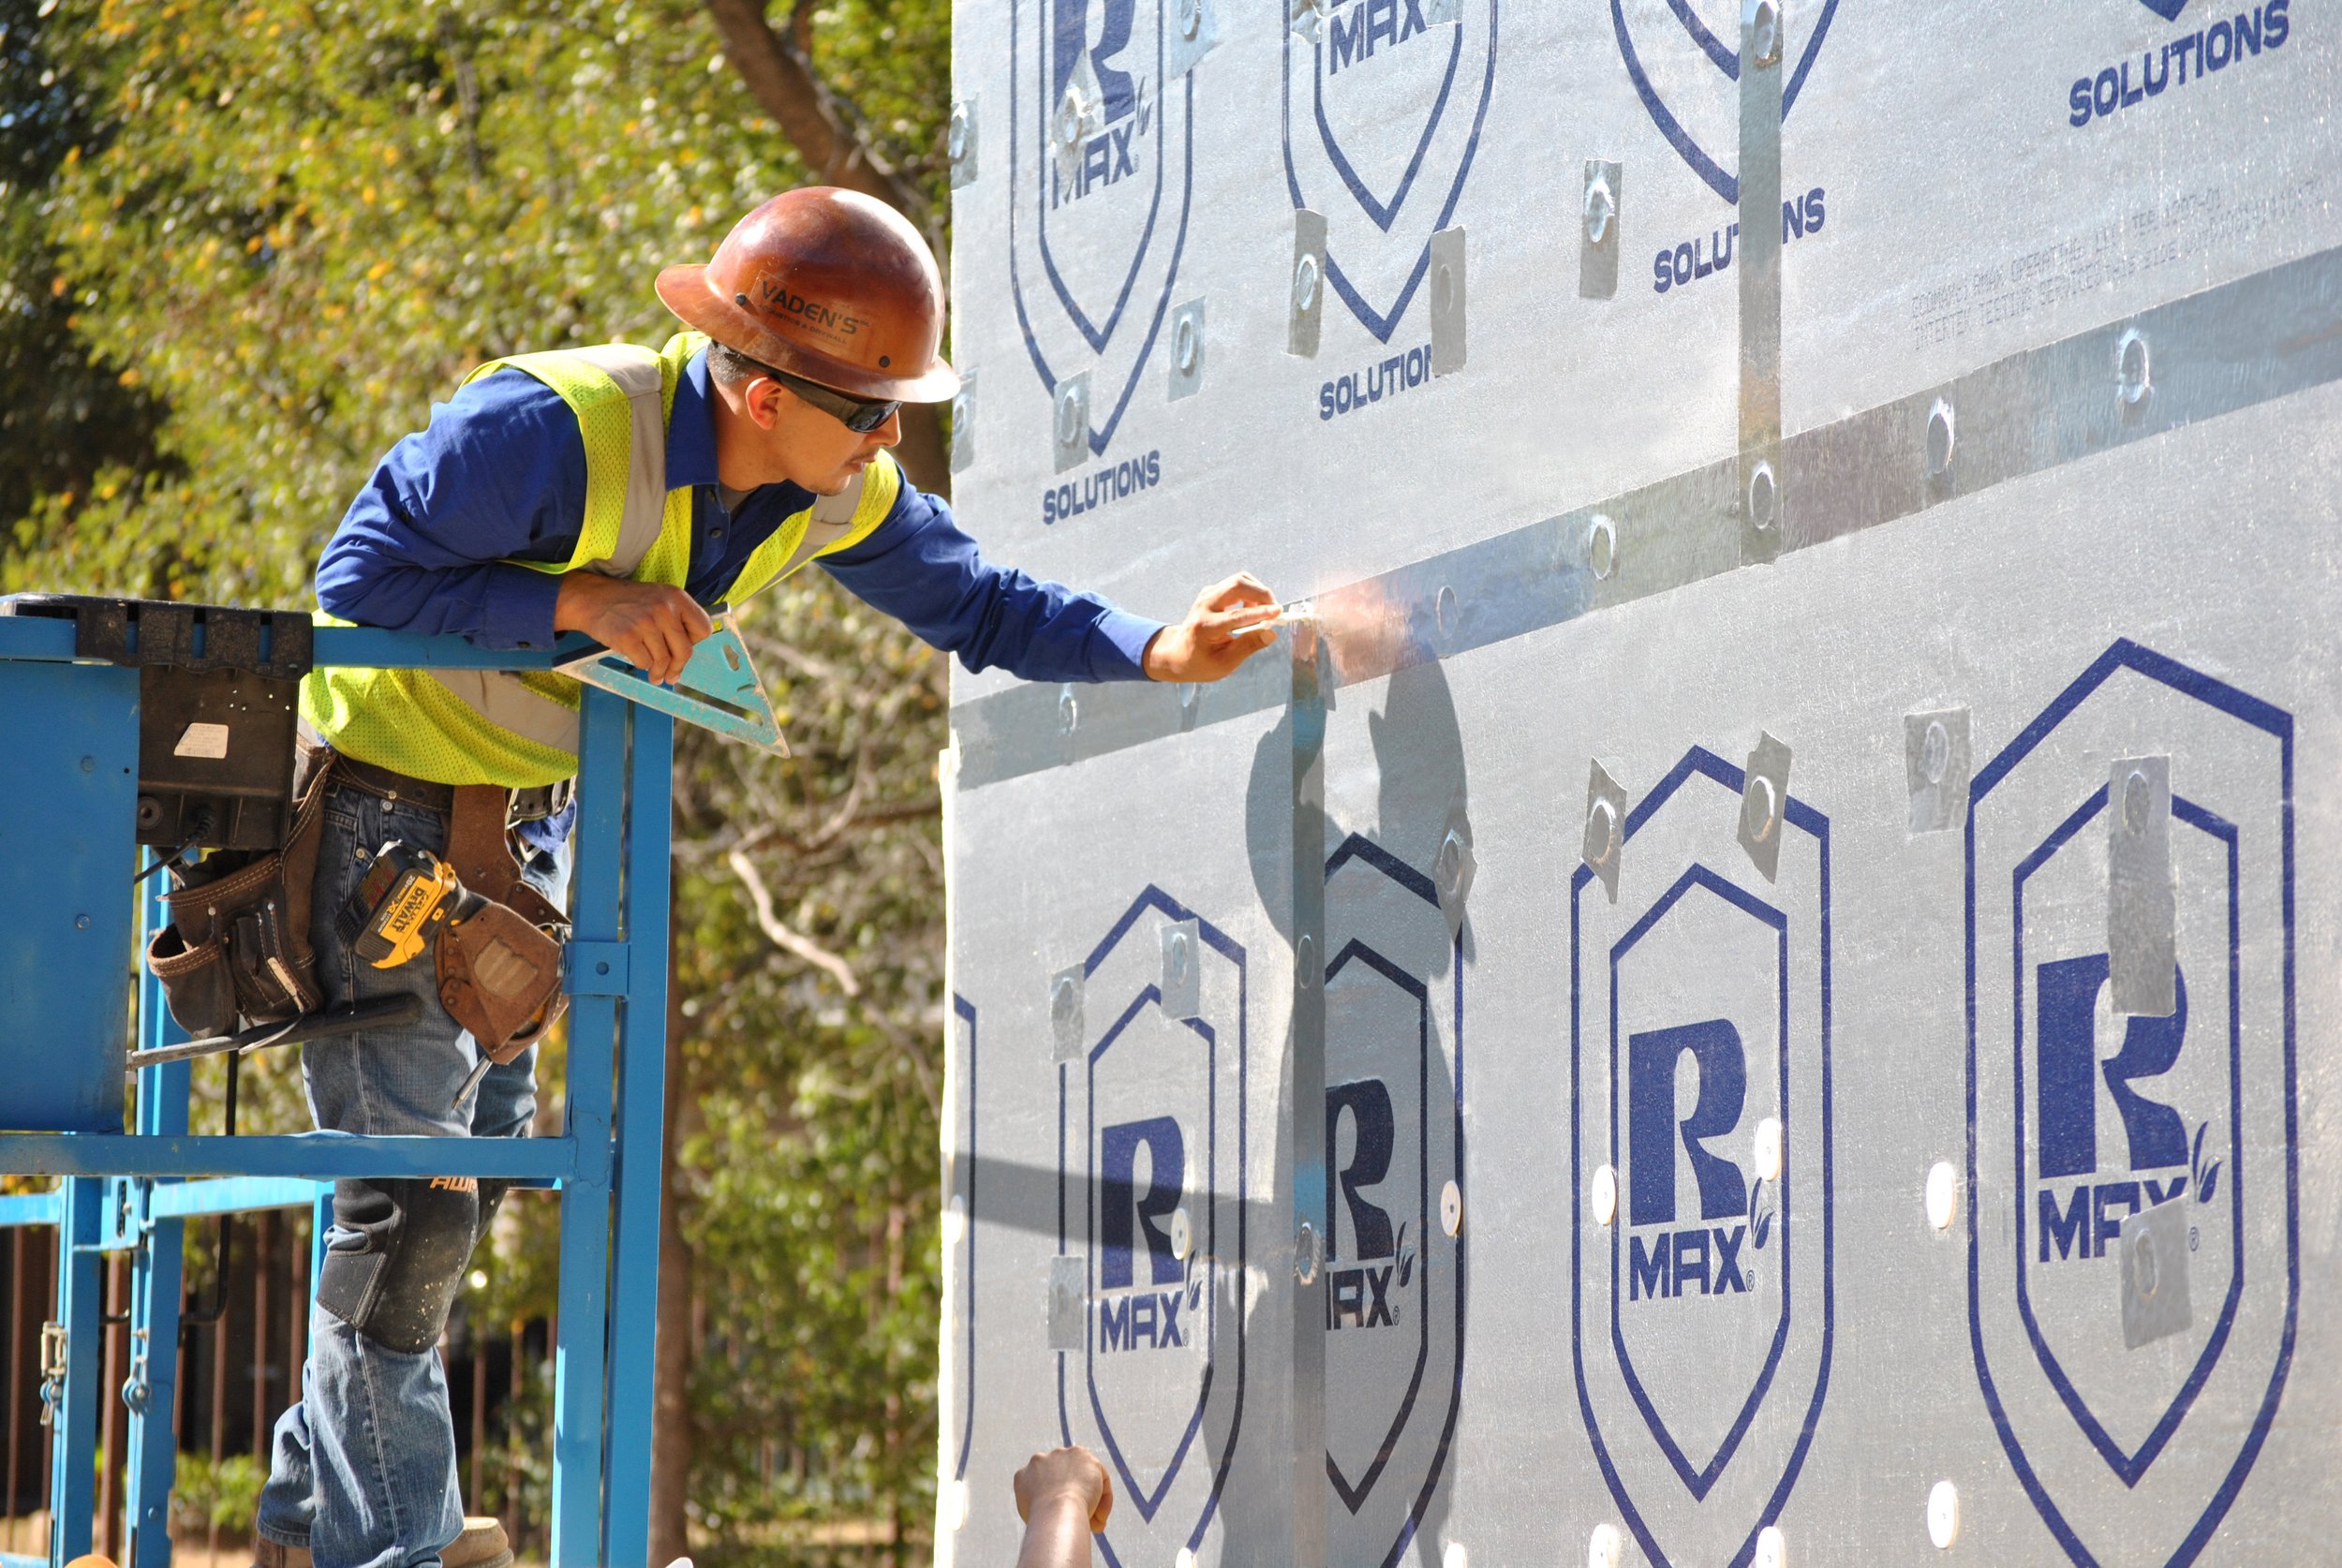
An Alternative to Rockwool

Luckily, there is an alternative to Rockwool Comfortboard 80. Polyiso is a comparable option to Rockwool when it comes to installing insulation on walls. Taking it a step further, polyiso outperforms Rockwool when it comes to installability, thermal performance, and price point. If you’re looking for a less expensive, lightweight alternative to Rockwool—without sacrificing on performance, consider polyiso.

Easier Installation

Polyiso can be installed in the same locations and applications as Rockwool as a continuous insulation, but with significantly less weight bearing on your installers and your walls. Since polyiso is made out of foam, it’s inherently lightweight and can be carried and maneuvered easily by a single installer without suffering from the fatigue of lifting heavy Rockwool boards, which may require two installers per board, or smaller board sizes.

R-Value Thermal Performance

It’s hard to beat the thermal performance of polyiso. At R6 per inch, it’s one of the best thermal insulation options for walls. With polyiso products like Rmax Durasheath® building envelope insulation, you can achieve an R21.8 with just 3-½” thickness, whereas achieving this same R-value with Rockwool Comfortboard 80 requires over 5” thickness.

Affordability

Polyiso insulation is affordably priced at just over a dollar per square foot for a two inch thickness. Rockwool, on the other hand, can be quite pricey at nearly two dollars per square foot at the same thickness. Since you’re getting less thermal insulating power for the same thickness, that’s a double whammy.

Availability

Polyiso is more readily available for purchase by ordinary homeowners, because it is available at building supply stores. Rockwool Comfortboard 80, on the other hand, can be a specialty item that is not stocked in stores and often requires a special order and larger quantities.

Tailored Performance

Polyiso has a unique advantage over most other wall insulation types, including Rockwool Comfortboard 80—it can be tailored to meet your project’s needs by applying an appropriate facer. Because polyiso not only accepts, but requires a facer during production, it gives you the choice between different performance properties that you want to incorporate.

For example, if you’re looking for an air and vapor barrier, you can find an all-in-one solution with Rmax’s ECOMAXci® FR Air Barrier. Rockwool, on the other hand, is vapor permeable and requires a second product to add vapor protection.

Here are more polyiso insulation products that are available as an alternative to Rockwool Comfortbatt 80:

Find the Perfect Insulation for Your Next Project with Rmax

Rmax has been in the insulation business for decades and has honed and perfected its evolving product line to meet building codes and customer needs. We have a full lineup of insulation solutions to help you meet your project’s requirements and get your next job started off on the right foot.

Talk with one of our experts today today to get help choosing the right insulation for your project!

Mineral Wool Insulation: Advantages, Disadvantages, and a Superior Alternative

Exploring alternatives to traditional building materials is a critical part of the construction process. Should you continue to use what you know has worked in the past, or is there something better out there? If you’re considering mineral wool insulation for your next project, it’s time to evaluate the pros and cons and know your options.

What is Mineral Wool Insulation?

Image Source

Mineral wool insulation is a building material used in construction to thermally insulate the building envelope as an alternative to fiberglass insulation. Builders realize the benefits of mineral wool insulation over fiberglass in several areas, including:

  • Higher R-Value

  • Better Acoustic Blocking

  • Superior Fire-Resistance

Like fiberglass, mineral wool typically comes in batts, but carries a little more stiffness and dimensional stability than fluffy fiberglass batts or rolls.

What is Mineral Wool Made From?

The minerals in mineral wool can come from volcanic rock as a raw material source. Another common raw material used to make mineral wool is called slag, a byproduct of molten metal production. Slag is a mixture of impurities and flux that escape the molten mixture during the melting process.

The raw materials in mineral wool are spun into fibers, glued, pressed, and formed together—to create cotton candy-like wool batts that can be installed in areas of the building envelope, like the cavities between studs in a stud wall.

Advantages and Disadvantages of Mineral Wool Insulation

When selecting the right type of insulation for your project, it’s important to weigh the pros and cons of each material. Let’s cover the advantages and disadvantages of mineral wool insulation.

Installation

Mineral wool is stiffer than fiberglass, which makes it easier to cut with precision and install to fit a space perfectly. On the other hand, since the material is much more dense than fiberglass, it is also much heavier. This can make the installation process a little more challenging due to the added weight of the material.

Thermal R Value

In terms of insulating value, mineral wool carries an R-value of just above R4 per inch, meaning that it requires 3.5” to achieve R15. It is an improvement over fiberglass, which carries an R-value of under R3 per inch, for an R13 at the same thickness of 3.5”.

When space matters, mineral wool carries a slight edge on thermal performance over fiberglass with the added benefit of enhanced sound blocking. However, there are other insulation options on the market today that provide significantly higher thermal insulating values than mineral wool.

Price and Availability

Mineral wool is more expensive than fiberglass and it can be more difficult to procure with fewer options available at local contractor supply warehouses. However, mineral wool can be tailored during the manufacturing process to meet specific needs and is available in various options, including:

  • Soundproofing

  • Fire-resistant

  • Fire and Sound

  • Increased Thermal Performance

Other types of insulation can introduce additional properties, but it’s generally the facer that is changed rather than the insulating material itself. Mineral wool is unfaced.

An Alternative to Overcome the Disadvantages of Mineral Wool Insulation: Polyiso

The disadvantages of mineral wool include price, availability, lackluster thermal performance, and limited installation applications. If you’re looking for an alternative to mineral wool, polyiso is a valid consideration. Unlike mineral wool, polyiso is a rigid foam insulation—so it is both lightweight, and easy to work with.

Polyiso comes in boards that can be cut to fit by hand. The modular sizing makes installation fast and easy, to decrease your cost of labor. Polyiso is also widely available from manufacturers in various thicknesses ranging from ½” up to 6” and it can be doubled up in multiple layers to meet thermal R-values with ease.

Polyiso outperforms mineral wool in thermal performance with a steady R6 per inch for polyiso. That means it only requires 2.5” of polyiso insulation like Rmax Durasheath® to meet R15, while it takes 3.5” of mineral wool.

When it comes to installing wall insulation, why limit yourself to the wall cavity or to using expensive furring to hold mineral wool in place? With polyiso, you can achieve continuous insulation on the outside of the stud cavity simply by fastening the insulation directly to your walls underneath your cladding.

You can also turn your continuous insulation into an air and vapor barrier with inventive polyiso products like the ECOMAXci® FR Air Barrier, which has glass fiber reinforced aluminum facers to limit moisture and vapor permeance, as well as air flow.

Rmax Can Help You Decide Which Insulation Solution is Best For Your Project

While there are some clear benefits of mineral wool insulation, there are an equal number of drawbacks. Get help choosing the right products for your next build by reaching out to the experts in insulation. We can help you pick a solution that meets your design criteria and fits within your budget.

Contact your Rmax representative today!

The Best Option for Exterior Foundation Insulation Panels

Insulation isn’t just for thermal comfort. When it comes to insulating your building envelope, it goes beyond the roof and walls above grade. Your foundation needs insulation, too. What exactly is required from below-grade foundation insulation panels? In this article, we’ll explore why you need to insulate a building’s foundation and what your options include.

Why Insulate Your Foundation?

Your project’s foundation needs to be protected in the same way as the rest of the building that you see above ground. Things that you need to protect your building envelope from include:

  • Moisture

  • Extreme temperatures

  • Water intrusion

Common problems that building owners face that can be solved by proper insulation at the foundation level include mold, mildew, water intrusion, and shifting of structural elements. When you use foundation insulation panels, you can minimize or eliminate these issues.

Eliminate Condensation

Exterior foundation insulation panels can reduce or eliminate condensation problems. Condensation happens when warm air drops in temperature quickly and the moisture condenses on a cold surface. If your walls are cold and your home is warm, you’ll have an increased risk of condensation problems. Installing exterior foundation insulation panels keeps your walls warm to match your interior space’s temperature.

Protect Your Structure

The freeze-thaw cycle can wreak havoc on buildings. Over the course of a year, most structures will experience extreme temperature variations, leading to the expansion and contraction of each of the building components. Extreme temperature fluctuations can lead to shifting, settling, and other problems in your structure. Protect your structure by shielding it from direct contact with these extreme changes in temperature with exterior foundation insulation panels.

Keep Water Out

Water flows through the path of least resistance. Since a building’s foundation creates a large hole in the earth that displaces soil and water, water will always try to get back in. That’s why waterproofing your foundation is so important. Applying waterproofing materials alone to your basement walls will not be sufficient. Because your waterproofing gets backfilled with soil, you’ll need to protect it. Foundation insulation panels an inch or so thick can do the trick, by ensuring that your waterproofing remains untouched andis able to do its job by keeping the water out of your building’s below-grade floors.

What Type of Insulation to Use on Exterior Foundation Walls?

Exterior insulation comes into contact with the elements directly, so you’ll want to make sure you’re using a compatible building material that will not be destroyed or hindered in the unpredictable below-grade environment. Using board insulation, such as XPS, EPS, or Polyiso—that was manufactured in a controlled environment is essential to making sure you’re applying a consistently high-quality layer of foundation insulation. Plus, it’s quick and easy to install with its modular form.

When comparing good, better, and best options for exterior foundation insulation panels, it ranks like this:

  • Good: Expanded Polystyrene Insulation (EPS)

  • Better: Extruded Polystyrene Insulation (XPS)

  • Best: Polyisocyanurate (Polyiso)

The rationale behind this comes from looking at the moisture absorption properties of each insulating material. EPS performs the worst with a water absorption of 2% or more, XPS is better with a moisture absorption of .3%, and polyiso takes the cake with a water absorption of less than .2% when choosing a foil-faced version.

Superior Foundation Insulation Panels

When shopping for exterior foundation wall insulation, you’ll want a product that will last. Polyiso has many more advantages when it comes to insulating foundation walls. It’s versatile, durable, affordable, and readily available.

Superior Foundation Insulation Panels

Rmax Thermasheath® is a premium foil-faced polyiso insulation used in new construction and renovation projects for exterior foundation insulation panels. It can be placed in conjunction with foundation waterproofing on below-grade exterior walls and with concrete foundations. With an impressive R-Value of R6 per inch, you can achieve high energy efficiency with minimal thickness while still providing protection to your foundation and waterproofing.

Rmax Thermasheath can be used as a Water-Resistive Barrier (WRB) when used together with construction tape at the joints. Polyiso is versatile because it is compatible with multiple attachment methods, including adhesives or mechanical fasteners.

Tapes that are compatible with Rmax Thermasheath® include R-SEAL 3000 and R-SEAL Construction Tape. R-Seal 3000 is an aluminum foil-coated tape with pressure-sensitive adhesive that makes it extremely resistant to humidity, moisture, and mold. R-SEAL Construction tape is a durable mold, moisture, and UV-resistant BOPP film with pressure-sensitive acrylic adhesive.

Rmax Can Help with Your Next Construction Project

Neglecting to insulate a building’s foundation can lead to structural problems, heat loss, moisture issues, and more. Before you break ground on your next construction project or remodel, give your local Rmax representative a call to make sure you’re utilizing the right types of insulation throughout your entire building envelope. From below grade—up to the roof—and everywhere in between, we can provide the best solutions.

Contact us today for advice from the insulation experts!

Mineral Wool Insulation vs. Fiberglass and a Better Alternative

In a world where there are endless choices in every market, construction is no different. It can make picking the right building materials for your next project feel like a spiral of endless decisions. One choice that you’ll need to make when designing your building envelope is which insulation to use.

If you’re asking, “What is the difference between mineral wool and fiberglass insulation?,” we’ve got the answer.

What is the Difference Between Mineral Wool and Fiberglass Insulation?

Before comparing mineral wool insulation to fiberglass, let’s define the basic properties of each insulating material by itself.

Fiberglass Insulation

Made from tiny glass threads that are spun into fibers resembling cotton candy, fiberglass insulation is a popular insulating material used in home construction projects.

You’ll see it loosely stuffed into stud wall cavities to fill the gaps and give a little thermal insulating value. It is flexible and can fit around irregular shapes, but it loses some thermal value if it’s compressed. It needs to stay fluffy in order to work, and it’s not self-supporting.

When packaged, fiberglass insulation typically comes in rolls or batts, with widths based on common stud spacing increments. Fiberglass insulation is a staple in home improvement stores and it is easy to find locally.

Mineral Wool Insulation

Mineral wool insulation is made in a similar way to fiberglass, but with different raw materials. Rather than glass, mineral wool uses molten rock or other minerals that are spun into a cotton candy-like blanket with additives. Like fiberglass, the fibers are then compressed and heated.

Mineral wool is a less common insulating material in homes, but is used more often in commercial applications, including wall cavities. Mineral wool insulation is heavier and more dense than fiberglass insulation, which makes it a little more difficult to work with. It can be purchased in large batts or boards.

Comparing Fiberglass vs. Mineral Wool Insulation

Fiberglass insulation and mineral wool insulation have a similar manufacturing process and both come out looking a lot like cotton candy. Let’s compare some performance specs:

Thermal R-Value

When comparing mineral wool to fiberglass insulation in thermal performance, mineral wool takes the cake. With an R-value of up to R15 for 3.5” mineral wool, it beats fiberglass by a couple of points at this depth. Fiberglass insulation has an R-value of about R13 at 3.5” thick.

Installation

Fiberglass and mineral wool insulation are both installed by loose-laying batts into stud wall cavities, and can be cut by hand with ease. Mineral wool requires an insulation knife and fiberglass insulation requires a utility knife with a straight edge.

Moisture Resistance

When comparing the moisture resistance of fiberglass insulation to mineral wool, there is a clear winner. Mineral wool is naturally moisture-resistant since it’s made of rock or slag fibers. Fiberglass insulation is more prone to water absorption—and if it gets wet, it creates an environment where mold growth is uninhibited.

Fire Resistance

In a fire, it’s critical that your insulation works to extinguish the flame rather than fuel the fire. When comparing mineral wool batt insulation to fiberglass, fiberglass is less fire resistant than mineral wool. Mineral wool has zero flame spread and no smoke when exposed to fire. Fiberglass, especially when using a kraft paper facer can both create smoke and spread the flame.

Cost and Availability

When it comes down to purchasing your building materials, cost and availability are important considerations. When looking at mineral wool insulation vs. fiberglass cost, fiberglass is less expensive and more readily available.

A quick search from a local big box store gave the following results:

Availability and Cost of Mineral Wool vs. Fiberglass Insulation

A Superior Alternative to Fiberglass and Mineral Wool

Fiberglass and mineral wool insulations are both good building materials, but there are superior options on the market today that outperform both of these choices.

Polyisocyanurate (aka polyiso) is a rigid foam board insulation that can be used as an alternative to fiberglass or mineral wool.

Here’s how polyiso stacks up against mineral wool vs. fiberglass insulation:

R-Value

At 3.5”, Rmax Thermasheath Polyiso® carries a thermal value of R23.9, that blows both fiberglass and mineral wool out of the water. It takes just 2” of polyiso to match the thermal properties of 3.5” thick mineral wool or fiberglass.

Installation

Polyiso is as simple to install as fiberglass and mineral wool, but has with the added versatility of being able to use it as a continuous insulation under cladding on exterior walls.

Moisture and Fire Resistance

Foil faced polyiso acts as an air and water vapor barrier when installed continuously—an option that is unavailable for batt insulations.

Cost and Availability

Polyiso is priced at around $1.00 per square foot for R13.1 (2” thick) from local home improvement stores and can be found more readily available from contractor suppliers.

Choose Rmax Polyiso For Your Next Project

Rmax has been in the insulation business for decades. We know our insulation and we can share our knowledge with you on your next project.

Let our experts help you find the right wall insulation for your next project. Reach out to your local Rmax representative today!

Shielding Your Project: Discover the Best Air, Water, and Weather-Resistant Insulation

The purpose of buildings is to provide shelter from the elements, such as wind, water, and protection from extreme temperatures.

Simple buildings with empty stud walls without any guts won’t necessarily provide much thermal comfort for the occupants though. Consider a storage shed that provides protection from overhead precipitation—but is usually quite uncomfortable, thermally speaking.

In order to get thermal comfort, you’ll need a good seal around the building envelope. That’s where air and water barriers come in.

Air and Vapor Barriers in Walls

Air barriers are a building component that helps limit the unintended flow of air into your building. Think of a drafty window in the winter. The cold air blowing in reduces thermal comfort. It’s the air barrier’s job to eliminate air movement through your walls.

A secondary function of many air barriers is that they can also act as a vapor barrier, by limiting the transmission of moisture through your walls. In this case, these building components are called air and vapor barriers. Air barrier insulation systems are an essential component in construction since excess moisture inside your structure can cause serious problems like condensation, high humidity, and mold growth.

How is an Air and Vapor Barrier Installed?

Air and vapor barriers come in many forms, including rolls, liquids, boards, and more. Here are a handful of the common air and vapor barriers you’ll see on jobsites:

  • Plastic Sheeting Film

  • Peel & Stick Membranes

  • Liquid Paint (Roll-on)

  • Liquid Coating (Spray-applied)

  • Spray-foam Insulation

  • Foil-faced Insulation Boards

Many air and vapor barrier options require a specialized trade contractor to install the air barrier onto an insulated wall system. For example, the peel and stick will require the insulation contractor to finish installing first, so that he can then apply the air and vapor barrier to the insulation.

Make It Part of Your Wall

Not all air barriers are also vapor barriers. Some air barriers allow moisture to permeate through. Likewise, some vapor barriers allow air to pass through. As you select your air and vapor barrier, make sure you’re picking a material for your design that will limit both air and water movement, and will also provide weather protection for your project.

Don’t let air and vapor barriers be an afterthought in your project. Instead, build your wall system to incorporate thermal performance (high R-values) while also optimizing air and vapor barrier technology. Luckily, there is a product for this application that works as a three-in-one: air barrier insulation systems.

Air Barrier Insulation Systems vs. Air Barriers

Many air barriers require the coordination of multiple trades to install a complete wall system. However, that’s where air barrier insulation systems are different. Insulation air barriers take two wall components and combine them so that they can be installed in a single pass by a single contractor. This saves on labor and shortens your construction timeline.

Rmax’s Water Vapor Barrier Insulation Solution

You’re already installing insulation, so why not turn your insulation’s facer into an air and vapor barrier? The ECOMAXci® Wall Solution combines Rmax’s premium insulation with an air barrier facer that combines high thermal performance with air and vapor performance to craft superior walls that maximize thermal efficiency.

The ECOMAXci® Wall Solution works like this:

  1. Install ECOMAXci® FR Air Barrier foil-faced thermal insulation boards on your wall surface.

  2. Treat joints and penetrations with either liquid flashing or tape flashing.

Benefits of ECOMAX® FR Air Barrier Wall Solution

The specs of the ECOMAXci® FR Air Barrier speak for themselves when it comes to performance. With an R 6.5 per inch, it maxes out the thermal performance capabilities of building insulation.

Check out the specs on the ECOMAXci® FR Air Barrier:

ECOMAXci® FR Air Barrier Specifications

Beyond the high R-value per inch, insulation air barrier systems have many advantages over traditional air and vapor barriers.

Take a look at more ways that ECOMAXci® FR Air Barrier can benefit your next project:

  • Eliminates the need for exterior gypsum

  • Eliminates the need for building wraps

  • Reduces coordination requirements between contractors

  • Reduces labor by installing air barrier and insulation at once

  • Lighter and easy-to-manage materials

  • Less-specialized installation

  • Provides continuous insulation

Rmax Brings You Solutions That Perform

Build your next project with innovative solutions that save on construction time and labor costs while also contributing to a higher-performing envelope. Rmax can help you pick the right weather resistant insulation and accessories that work with your budget and design priorities. Reach out to your local Rmax representative today for guidance on your next job!

Common Problems with Polystyrene Insulation Board and a Better Alternative

As you browse building materials for your construction project, you may become overwhelmed with decision paralysis, especially when choosing between different types of insulation. The key to making the right choice is to broadly narrow down your options as far as possible, and then do a thorough comparison on the remaining few.

If that’s where you’re at—you’ve narrowed down your selection to a few options, and you’re faced with choosing between polystyrene and polyiso board insulation—we can help.

Let’s cover the basics, first.

What is Polystyrene Insulation Board?

Polystyrene is a plastic-based polymer that is used to create polystyrene foam board insulation. In its raw form, polystyrene looks like small plastic beads. The polymer beads can be manipulated with heat and blowing agents to encapsulate air and other gasses to manufacture two major types of foam insulation commonly used in construction today: extruded polystyrene (XPS) and expanded polystyrene (EPS).

Extruded Polystyrene

Extruded polystyrene is commonly called XPS, blue board, or pink board. XPS is made with polystyrene beds that are melted, compressed, and extruded into board shapes of varying sizes. Extruded polystyrene rigid insulation board is used in everyday construction; it’s often found in below-grade applications.

Expanded Polystyrene

Expanded polystyrene is called EPS, or beadboard, in construction lingo. EPS is made by using steam to expand and inflate the polystyrene pellets. The expanded pellets are then placed in molds and steam-fused together. After that, they cool and are cut to custom sizes. Expanded polystyrene board insulation is used in construction throughout the entire building envelope.

Disadvantages of Polystyrene

When comparing polystyrene to other building materials, such as polyisocyanurate board insulation, it’s important to consider weaknesses. Here’s where rigid polystyrene insulation boards fall short:

Limited Service Temperature

Polystyrene is a thermoplastic material, meaning it can become malleable and will melt above a certain temperature. Both extruded and expanded polystyrene have a maximum service temperature of about 165 degrees Fahrenheit. 

Since building envelope surface temperatures commonly exceed this temperature in the summer months, that could mean disaster for polystyrene foam board insulation.

Low Melting Point

The type of building materials you choose can have a big impact on how well your structure can survive a devastating event like a fire. With its low melting point, polystyrene insulation can pose a higher risk than other building materials during a fire. 

Rather than being fire-resistant or fire-retardant, polystyrene melts when exposed to flame. The liquified material can drip and spread fire to other parts of the building.

R Value

Thermal resistance, or R-value, is a key consideration when choosing your insulation. 

Higher R-values mean that your insulation works better to keep temperatures stable inside your building. A higher R-value per inch means that you can achieve the same code performance level with less material. Polystyrene insulations carry an average R-value of around R4 or R5 per inch, varying slightly depending on the type and density used. This is a middle-of-the-road value and there are better insulators than polystyrene board insulation if you need a higher R-value per inch for your project.

Water Permeance and Absorption

Insulation that absorbs water can compromise the insulating value and can lead to mold and other problems over time. Expanded polystyrene insulations have water absorption of between 2-4%. Surprisingly, this is higher than other types of insulation, which can achieve less than 1% water absorption. Similarly, water vapor permeance measures whether vapor can pass through the insulation. 

Expanded rigid polystyrene board insulations carry a water vapor permeance of between 2.5 to 5 perms, which allows vapor to pass through at a higher rate than extruded polystyrene or polyiso.

Polyiso Instead of Polystyrene

Now that we’ve covered some of the shortcomings that come with polystyrene board insulation, let’s introduce a better solution—polyiso.

Here’s why polyisocyanurate, or polyiso, is superior to polystyrene. The service temperature of polyiso is nearly double that of polystyrene. Polyiso can be installed in applications up to 250 degrees Fahrenheit. Additionally, polyiso does not melt at high temperatures or when exposed to flame. Instead, it chars.

Thermal performance is another area where polyiso is the clear winner when compared to polystyrene rigid insulation board. Polyiso has an R-value of R6 per inch, which is a significant metric when you need to insulate narrow spaces like wall cavities.

Finally, when it comes to water resistance, polyiso again outperforms expanded polystyrene. Water absorption of polyiso sits at less than 1% volume and water vapor permeance at less than 1.5 perms.

Find the Best Polyiso Insulation Solutions with Rmax

Choosing between rigid polystyrene insulation board and polyiso becomes easier when you have all the facts. Are you ready to make the call and specify your building’s insulation? Rmax can help you choose the best polyiso for your next project. Reach out to your local representative to get started!

The Best in Insulation: Understanding Sustainable Rigid Insulation

Sustainable Rigid Insulation

If you’re going green on your next construction project, you’ll need to know what your options are when it comes to sustainable rigid insulation. In this article, we cover common types of rigid foam insulation, which ones are most sustainable in building construction, and why.

Types of Rigid Foam Insulation

You have choices when it comes to selecting a suitable rigid foam insulation board for your building’s walls, foundations, and the rest of the envelope. Here are the three common foam board insulation types used in construction:

  1. Extruded Polystyrene (EPS)

  2. Expanded Polystyrene (XPS)

  3. Polyisocyanurate (Polyiso)

Of these, polyiso is the most environmentally friendly. Let’s find out why.

Sustainability Factors

To determine whether a building material is sustainable, we need to get more specific about what makes something sustainable. We’ll use LEED (Leadership in Energy and Environmental Design) to help us define sustainability. LEED is a certification system developed by the U.S. Green Building Council that rates buildings based on their impact on the environment.

There are multiple routes to achieve LEED certification for your building, but here are the primary goals to focus on when it comes to choosing sustainable building insulation.

  • Increase Energy Efficiency

  • Reduce Impact on Environment

  • Promote Sustainable Material Cycles

How to Source Sustainable Rigid Insulation

How do you put those goals into action and find the most sustainable rigid insulation? Here’s what to look for:

Raw Materials

When choosing your building insulation, take a look at the raw materials used to manufacture the product. Polyiso, EPS, and XPS are all made from non-renewable petrochemicals. Currently, none of the foam insulation boards we use today are made from 100% renewable resources. 

Renewable materials are the raw materials that replenish their own reserves quickly, such as those materials derived from quick-growing crops. They do not deplete the Earth’s natural resources, thus promoting more sustainable material cycles. 

They may not always come in board form. Some examples of insulation types that are made from renewable raw materials include wool, cotton, and cork.

Recyclable

Foam board insulation isn’t made from renewable resources, but it is highly recyclable. All three types of foam insulation board can be recycled and reused at the end of their life cycle. 

For example, when a building is remodeled, the existing insulation can be removed and reused on other projects. The facers on polyiso can also be recycled up to 100%.

Manufacturing Process

When selecting a sustainable rigid insulation for your project, take a look at how the insulation is made and what the impact of that process is on the environment. New technologies are allowing for more sustainable manufacturing processes and better blowing agents for foam insulation boards. 

Look for a product that uses environmentally friendly manufacturing processes. Rmax polyiso uses third-generation blowing agents that produce zero ozone depletion. All Rmax polyiso insulation boards are HCFC-free and CFC-free.

Performance

Insulation is unique when it comes to promoting sustainability because it creates a lasting effect. The more effective your insulation is at insulating your building, the more energy is conserved by the HVAC systems running inside. 

The most sustainable rigid insulation is one with a high R-value that can be installed continuously without thermal breaks. Polyiso carries the highest R-value per inch when comparing the three board insulation types.

Durability

A building material that works great but ends up in a landfill five years later is not very sustainable. Rather, sustainable rigid insulation needs to last at least as long as the life of the building—if not longer, so that the energy expended in creating, transporting, and installing the material achieves maximum efficiency. 

While all three foam board insulation types are reusable, polyiso is the most durable with its protective facers.

Local Impact

Consider the local impact on the environment when choosing sustainable rigid insulation. For example, if the manufacturing plant is closer to the jobsite, it requires less fuel and resources to transport the material to the construction site. 

On the other hand, if your product is manufactured across the country or even across the ocean, it’s going to have a larger negative impact.

Clean Air

Our building materials can have a positive impact on the indoor environment, including the air we breathe and creating healthy spaces for occupants. Rmax is proud to have received Clean Air Gold Certification from Intertek Sustainability. This certification means that Rmax insulation products do not have VOC emissions that negatively impact indoor air quality.

Rmax Polyiso: Your Sustainable Rigid Insulation Solutions

Going green in construction is a noble cause, and simply by evaluating the environmental-friendliness of your envelope’s insulating materials, you can make a notable impact. For a complete review of how Rmax polyiso is a qualified sustainable rigid insulation, read more in our Rmax LEED Credits Worksheet. 

Not sure which Rmax polyiso product is right for your project? Reach out to your local Rmax representative for help!

Improving Efficiency: Why You Should Insulate The Exterior Side Of The Foundation Wall

Starting with the basics—your foundation is literally the most important part of your building. Without a sturdy and functional foundation, a building will shift, crumble, and become exposed to the unforgiving elements that can wreak a lifetime of havoc once inside. 

It’s critical to protect your building’s foundation from the start, but did you know that insulating foundation walls on the exterior side is one way that you can proactively protect your structure? Since building codes require insulation on basement walls for climate zones three through eight anyway, why not maximize your investment by placing it on the exterior face of the wall?

There are many advantages to insulating the exterior side of the foundation walls:

Protection

Your foundation needs protection from the elements. Using waterproofing along with foundation wall insulation can substantially preserve your building’s foundation. Start by designing a comprehensive wall section. 

This means that you’ll incorporate waterproofing and protection board in addition to the structural components like concrete or masonry that you find in standard foundation walls. The added layers help keep water out. 

Additionally, the foundation foam insulation on the exterior side provides a buffer zone of protection for your newly installed waterproofing from backfilled soil. This protection layer typically consists of one or two inches of foam board like extruded polystyrene or polyiso.

Cost Savings

When you design your foundation walls, keep in mind that you can save on building materials by moving the foundation wall insulation to the exterior side. That’s because insulating foundation walls from the outside doesn’t require an expensive finish on top. Instead, the exterior-facing insulation is backfilled and covered by soil. 

Increase Useable Area 

Insulating your foundation on the exterior side of the wall cavity increases the building’s usable square footage because the insulation doesn’t encroach upon the interior space. This results in a lower price per square foot and a higher value to the occupants. It may seem insignificant, but consider a 10’x10’ room with 2” insulation on each wall. When insulated on the exterior, you get 100 SF, but if you insulated on the interior, usable square footage goes down to 93 SF. 

In a building with fifteen rooms this size, you’ll lose an entire room’s worth of space just by insulating on the interior side of the foundation wall.

Energy Efficiency

When you insulate foundation walls, it’s important to consider whether the installation will be continuous. Traditionally, interruptions in insulation by studs or other components have been acceptable. However, continuous insulation is more widely specified in the latest building codes. 

This installation style minimizes heat loss and provides increased energy efficiency for your HVAC systems. When you choose board insulation on the exterior side of the foundation wall, there are naturally fewer obstacles—which allows you to achieve continuous insulation effortlessly.

Freeze Thaw Protection

The freeze-thaw cycle that most regions in the U.S. experience throughout the seasons can inherently cause damage, including cracking and shifting, to your foundation. 

Luckily, you can minimize the impact of the freeze-thaw cycle by insulating foundation walls on the exterior side, to provide a cushion that allows expansion and contraction as the Earth’s temperatures fluctuate. The insulation on your foundation also provides a thermal break so that extreme temperature gradients are not making direct surface contact.

Minimizes Condensation

Condensation happens when warm air, which holds moisture, cools quickly and can no longer hold the moisture—so it condenses into water droplets on a cooler surface. This often happens on foundation walls because the cool concrete or masonry holds its temperature while the air temperature rises. 

This provides an environment where condensation is prone to forming. However, you can minimize or eliminate condensation in this area by installing foundation foam insulation boards on the exterior side to keep your foundation walls warm and reduce the drastic temperature variation that causes condensation. 

Easy Install

Installing insulation can be time consuming and labor intensive, but it doesn’t have to be. When you move your insulation to the exterior side of the foundation wall, installation is a breeze. Simply tack modular boards to the outside of the foundation wall in a temporary manner until the soil is backfilled for permanent securement. 

Exterior vs. Interior

Sometimes insulating the outside of the foundation wall is not practical. This is the case in many retrofit projects where the soil would need to be excavated around the building in order to install the insulation. Interior insulation is a more practical solution when you cannot easily access the outside vertical surface of the foundation.

Rmax Can Help You Pick the Right Insulation

Picking the right type of building materials can become a headache in a hurry, but it doesn’t have to be overwhelming. 

Ask for help from the experts at Rmax, who know all about building insulation types, where to use them, and how to fit the right one into your budget. Our representatives can review your project’s design and help you pick the right insulation for the job. Get answers today by reaching out to your local Rmax representative!

A Comprehensive Overview of Polyiso Wall Insulation


What is Polyiso Wall Insulation?

Polyiso wall insulation is a building material commonly used in both residential and commercial structures. Whether you’re looking for wall insulation for your home remodel or your new construction project, polyiso wall insulation will provide a tailored solution for your next project. 

Of all the building materials available for insulating the building envelope, rigid foam board—in the form of polyiso—is a superior option.

Benefits

Just claiming that something is superior doesn’t make it so. Let’s back up our statement with the facts. Here are just a few of the benefits of using polyiso wall insulation on your next project:

Easy to Install

The nature of polyiso is that it’s a rigid foam insulation board. That means it’s lightweight, it can be cut by hand into custom shapes and sizes, and it holds its own when attached to your studs. 

Polyiso boards come from the factory in modular sizes, typically 48” x 96” (4’ x 8’) or 48” x 48” (4’ x 4’). The thickness can be customized from ½” up to 4-1/2” thick per layer. 

Polyiso wall insulation can also be installed in multiple layers, if desired. Materials that are easier to install mean decreased labor costs for your project.

Continuous Insulation


As building codes evolve, “continuous insulation” is a term that appears more and more. 

Continuous insulation calls for a constant thermal resistance (R-value) across the entire surface area. Today, many building codes require continuous insulation throughout the building envelope. Polyiso wall insulation is an ideal material to use for continuous insulation because it naturally provides a continuous R-value. That’s because polyiso wall insulation boards are butted up against each other to create a continuous, smooth surface on the wall.

Performance

The purpose of building insulation is to provide thermal resistance—so that heat loss is minimized and energy is conserved. Insulation performance is measured in R-value. 

The higher the R-value, the better insulated your building is. Polyiso wall insulation carries an R-value of R6 per inch, which outperforms other insulating materials like fiberglass batts when comparing similar material thicknesses. A higher R-value per inch means you’ll be able to get more insulating power out of a thinner material that fits inside your wall cavity.

Versatility

Polyiso wall insulation can be customized to fit your project’s needs and budget. Not only does it come in a wide range of thicknesses and sizes, but it also comes with different types of laminated facers to achieve additional material properties. For a more economical option in concealed applications, you can choose a standard facer, and for projects where you want to turn your insulation into a structural nailboard, you can fasten your exterior finishes to a plywood laminated polyiso product such as ECOMAXci® FR Ply.

FAQs

Where is Polyiso Wall Insulation Used?

Polyiso wall insulation is used on the vertical surfaces of the building envelope—on the walls that separate the inside of your building from the outside. You’ll find polyiso wall insulation used on exterior foundation walls, on the interior side of basement walls, on the exterior side of stud walls, and even inside masonry wall cavities.

What is the R-Value of Polyiso Wall Insulation?

The R-value of polyiso wall insulation varies by manufacturer, but is typically around R5-R6 per inch. Rmax polyiso wall insulation products, including Durasheath® and Thermasheath®, carry an R-value of R6 per inch. That means one inch gives an R-value of 6. For your next project using one of these Rmax polyiso wall insulation products, you can achieve R20 with a single layer of 4” thick boards or two layers of 2” thick boards. Consult the specific product data sheets for exact R values.

Is Polyiso Wall Insulation Waterproof?

The foam core of polyiso wall insulation is naturally water-resistant because of its chemical makeup (thermoset plastic) and closed-cell structure. It’s actually the facer of polyiso that determines whether the boards are fully waterproof. A cellulose (paper) facer is not waterproof, while a foil facer (aluminum) provides enhanced water resistance.

How Do I Attach Polyiso Wall Insulation?

You have three choices of installation methods for polyiso wall insulation, depending on your installation. Most often, polyiso wall insulation is mechanically attached to studs, plywood, or furring with screws that have large, specialized washers to secure the insulation. Another installation method is adhering polyiso wall insulation to a substrate (such as a concrete wall) with specialized construction adhesive. Lastly, in some cases—you can simply install polyiso wall insulation without any fasteners by using a loose-laid application. This method is used alongside metal furring channels that hold the boards in place or when backfilling a foundation wall with soil.

What Are Other Types of Wall Insulation?

Other common wall insulation materials include fiberglass batts or rolls, spray-foam insulation, loose-fill cellulose insulation, and other types of polystyrene foam boards like extruded (EPS) and expanded (XPS).

Maximizing Energy Efficiency with Rigid Foam Insulation

There is an enormous selection of building materials available on the market today, and choosing the right materials can quickly become overwhelming. When it comes to insulation, you can choose from blankets to beads, boards and even blocks. From there, you have even more choices to make, such as the chemical makeup which can include various types of foam, fiberglass, and more.

Rmax simplifies the selection process in this article by breaking down a tried-and-true building component that they've been manufacturing for decades: rigid foam insulation. 

What is Rigid Insulation?

Let’s start by answering the simple question: What is rigid insulation? Rigid insulation, like all insulation, is a building material used in construction that creates a thermal barrier to separate the inside of your building from the outside. Rigid insulation is often produced as rectangular-shaped boards that are installed in a modular fashion. 

One way to define rigid insulation is by answering the question: What is rigid insulation not? Rigid insulation can be differentiated from other types of insulation by the following characteristics:

  • Dimensional Stability: Unlike beads, spray foam, or batts, rigid insulation holds its manufactured shape rather than conforming to its surroundings. This means it can be used outside the wall cavity since it doesn’t require a container to support it.

  • Compressive Strength: Other types of insulation like cellulose or fiberglass blanket carry virtually no compressive resistance, while polyiso rigid insulation boards typically boast a compressive strength of 20 psi or higher. This means you can walk on rigid insulation without damaging it.

  • Installation Method: Rigid insulation can be installed by fastening, adhering, or loose-laying modular boards to structural sheathing, studs, walls, or decking. 

What is Rigid Insulation Made of?

Now that we’ve established a basic understanding of what rigid insulation is, let’s answer the question: What is rigid foam insulation made of? There are three main types of rigid foam insulation that you’ll see in the construction industry:

  1. Expanded Polystyrene (EPS)

  2. Extruded Polystyrene (XPS) 

  3. Polyisocyanurate (Polyiso)

Each of these rigid insulation types is made of different raw materials (resins and additives), and each one has its own manufacturing process. The final product comes out looking very similar for all three varieties of rigid insulation: rectangular 4’x8’ boards in various thicknesses ranging from ½” up to 6”. 

Polyiso insulation contains an additional component that is not included in EPS or XPS. That’s because the manufacturing process requires a facer on either side of the foam. Polyiso consists of a foam core that is sandwiched between two facers. The facers are made of a material like foil or fiberglass-reinforced cellulose. EPS and XPS, on the other hand, do not require a laminated facer and have a homogenous makeup.

What is Rigid Board Insulation Used for in Construction?

Rigid insulation is versatile and can be used throughout the building envelope, including inside and outside of the wall cavity, roofs, attics, and foundations. Rigid insulation, like Rmax Durasheath®, is used on exterior walls under siding and wall finishes, on the interior of basement walls, and as protection to newly installed waterproofing on the outside of foundation walls for backfilling.

Rigid insulation is the go-to material in commercial roofing systems. It’s used to insulate the building from above and create a drainage slope on flat roofs. In fact, to meet current energy codes, many commercial roofs require more than five inches of rigid insulation above the roof deck and below the roof membrane! 

Benefits: Why and What Rigid Foam Insulation is Best?

A clear advantage that rigid insulation has over other types is its ability to be applied in a continuous manner. Continuous insulation is when your insulating material goes uninterrupted across the surface of your building. Rigid insulation is inherently a continuous insulator. 

Additionally, the boards are often applied in two layers. When installed this way, joints are staggered and there is less opportunity for leaks to occur through the insulation joints. If you’re looking for insulation that enhances your building’s energy efficiency, rigid foam insulation gets the job done, by achieving a thermal resistance of R6 per inch for polyiso rigid foam insulations like Rmax Thermasheath®.

For an even bigger boost in energy efficiency, polyiso rigid foam insulation has another major advantage. It can be laminated to air and vapor barrier materials so that it can be installed in a single application. The Rmax ECOMAXci ® Wall Solution combines a fire-rated polyiso foam core with a 12 mil foil facer. When properly installed with joints sealed, it can function as an all-in-one air and vapor barrier, plus insulator.

What is the Best Rigid Foam Insulation? Rmax Can Help You Decide 

Save time and money now, and later on down the road, by choosing the right insulating material for your construction project. If you’re still not sure what the best rigid insulation for your building is, Rmax can help you choose the right fit for the job. 

Reach out today to learn more!

Rigid Wall Insulation Installation: Techniques for Enhanced Thermal Performance

How well is your building sealed? If you can feel drafts through your walls and around windows or other openings, then your building envelope may be lacking in this area. The culprit? Your building’s outside wall insulation installation method used during initial construction may be to blame. Building insulation performs best when it is continuously sealed.

In this resource, you will learn several tips and tricks to optimize your wall insulation installation techniques to achieve enhanced thermal and moisture performance inside your building envelope.

Why Choose Rigid Insulation Installation for Exterior Walls?

Rigid insulation is a popular choice for exterior walls. There are many advantages to choosing rigid foam insulation, such as polyiso, for your walls—including:

  • High R-Value per inch

  • Not limited by 2x4 framing thickness

  • Provides a flat, smooth surface for exterior finishes

  • Efficient installation with modular board sizes

  • No mess during or after installation

How to Install Rigid Wall Insulation on External Walls

Let’s cover a quick how-to guide on installing polyiso insulation on exterior walls. For this example, we’ll show you how to install Rmax Durasheath® building envelope insulation. This is a closed-cell polyiso foam core with non-metallic, coated glass fiber mat facers.

In a residential application, wall insulation installation usually occurs with fiberglass batts between wood stud walls. However, the thickness of this cavity space can limit the insulating power. That’s why some homeowners choose to add continuous insulation to the outside surface of the studs. Adding just one inch of polyiso can add R6 to the thermal resistance.

To install rigid insulation on the external walls of a home:

  1. Place the modular 4’x8’ boards either horizontally or vertically butted against each other. 

  2. Align vertical joints with structural backing and fasten with at least eight screws and washers per board into studs or structural sheathing (such as plywood). 

  3. Continue with an air barrier and/or exterior finish

This particular product does not require joint taping, but it can be installed if desired.

Pro Tips for Sealing Insulation on Wall Installations

Although not all rigid wall insulation requires sealing, doing so can fortify your structure and significantly decrease heat loss, air leaks, and moisture intrusion. If you’re already installing continuous insulation, why not go the extra mile and seal it up? 

If you decide to seal your joints, we’ll cover the tools you’ll need for installations like the ECOMAXci® Wall Solution, which performs as both the air barrier and continuous insulation. With this application, you’ll seal all the joints between boards (vertical and horizontal) with either tape or liquid flashing, and you’ll detail any penetrations like windows or pipes with 35 mil polyethylene butyl tape.

Tools Required for Wall Insulation Installation

ECOMAXci® can be installed in two ways, either by taping joints or using liquid flashing. 

Here are the tools needed for each method:

For Pressure-Sensitive Tapes

  • Utility Knife

  • Measuring Tape

  • Insulation Knife

  • Rubber Hand Roller

  • Cordless Impact Driver

Additional Tools For Liquid Flashing Details

  • Plastic Putty Knife

  • Wet film Thickness Gauge

  • Caulk Gun

  • Spatula 

Once you’ve got your tools, you’ll also need to have the right building materials. Besides your insulation, you’ll need plenty of fasteners, washers, tapes, and sealant on the jobsite.

Materials Used by Pros in Outside Wall Insulation Installation

  • Insulation Boards

  • CI Prong Washers for wood or metal studs/backing

  • Grip Deck Self-Drilling Screws or other appropriate anchors

  • R-seal 3000 (joint tape) or R-seal 2000LF (liquid flashing)

  • R-seal 6000 (for windows/penetrations)

Choosing the right materials for the job is one way you can optimize your installation. Since there are various types of fasteners, tapes, and accessories available, check with your Rmax representative to recommend which product is best for your project’s application.

Tips for Reducing Wall Insulation Installation Costs

Here are a few pointers to get you started on the right track:

Watch Installation Videos

Watching the manufacturer’s installation videos is a great way to understand the process before you begin your external wall insulation installation. Find several installation videos from Rmax for their current products in their “Installation Guides and Videos” section online, including:

Plan Your Layout Before You Begin

You can save a lot of time by investing a little up-front time planning before you begin the installation process. Some factors to consider before you start rigid insulation installation on exterior walls include:

  • Decide which fastener type to use with your wall. 

  • Purchase a little more than you’ll need to account for waste (typically between 3-10%).

  • Study the manufacturer’s recommended fastening pattern to familiarize the layout.

  • Buy the correct length fasteners (1” penetration into your substrate).

  • Make a jig that helps you locate the studs more easily for fastening.

  • Decide whether you’ll lay your boards vertically or horizontally. 

More Installation Tips

Finally, you’re ready to install, here are a few more pointers to help things move smoothly.

  • Keep cut boards so you can use them later in the installation when possible.

  • Do not countersink screw heads (keep flush).

Rmax Can Help Your Installation Run Smoothly

Rmax has worked with countless contractors during the installation process and is standing by in case you have any questions or need guidance during the process. 

Contact your local Rmax representative today to start planning!